
Today is the third and final post in this Easy Machine Applique Hexie Pillow series - and it’s when we turn these scraps and fabric square into a beautiful pillow cover! In Week One we made the fabric hexies and in Week Two we sewed them onto a fabric square. This week we'll add a zipper to complete the pillow cover.

To finish this project you will need:
- your 14”x14” fabric square with all the hexies sewn on
- a half yard of fabric for the pillow back
- one 12” zipper (any color since it will be covered)
- your sewing machine with a zipper foot
- coordinating thread
- pins and scissors
From your backing fabric, cut a rectangle that measures 15” wide by 9” high. Lay the fabric in front of you with right side up.

Take your zipper and open it half way. With the zipper right side DOWN, center it along the top edge of the back piece, as shown, and pin in place.

Using your zipper foot positioned to the right of the zipper teeth, sew the length of the top edge, directly through the center of the zipper tape.

Flip your backing piece face up again, pulling the fabric down, away from the zipper teeth. Press the edge of the fabric, keeping the iron clear of the plastic zipper teeth.

Using your zipper foot and with the needle positioned to the right of the foot, topstitch the fabric close to the folded edge. Set aside.
Cut a second piece of backing fabric that measures 15” wide by 11” high.

Lay your first half of the backing face up on the table in front of you.

Matching the long 15” edges, lay the second backing fabric piece face down on top of the first piece, lining top edge of the fabric with the top edge of the zipper tape. Pin in place.

Using your zipper foot, sew along the pinned edge just like you did with the first half of the backing.

Lay your full backing piece, with the zipper in the center, in front of you, right side up. You will not press or topstitch this second side yet like you did with the first side.

Gently fold the top backing piece down over the top of the zipper, overlapping it about 2”. This is how the overlap looks from the side edge:


Pin the overlap in place.

Flip the back over so the wrong side is face up and you can see the zipper. Sew down the center of the second side of zipper tape - you’ll know it’s the correct side of the zipper tape if it only has one line of stitching so far. Run this line of stitches right over the top of the first sewn line (you don’t have to hit it exactly because the first sewing line will be hidden - just use it as a guide).

Flip the backing so the right side is up and give it a good press with your iron, again minding the plastic zipper teeth. You can iron over them, but don’t let the iron linger on them for too long. Be sure your zipper is still partially open.

With your pillow backing right side facing up, center your pillow front face down on top. Make sure the folded edge hits the center of your pillow sides. Trim excess backing fabric away.

Pin all around the perimeter of the pillow cover and sew around all four sides.

Carefully snip off each corner, being careful not to snip through your stitching.

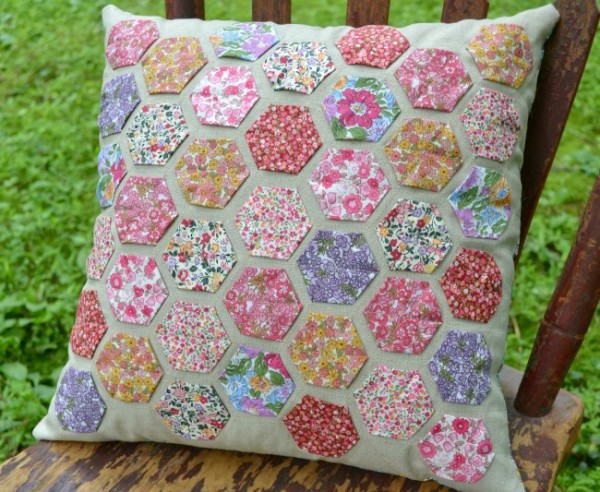
Turn the pillow cover right side out, stuff your pillow form inside and zip it up. Enjoy your fine work!

This pillow is also really fun made with a thick wool felt as a backing - experiment with what you have on hand or try out different fabrics - you will be pleased with all the fun variations you can come up with!