
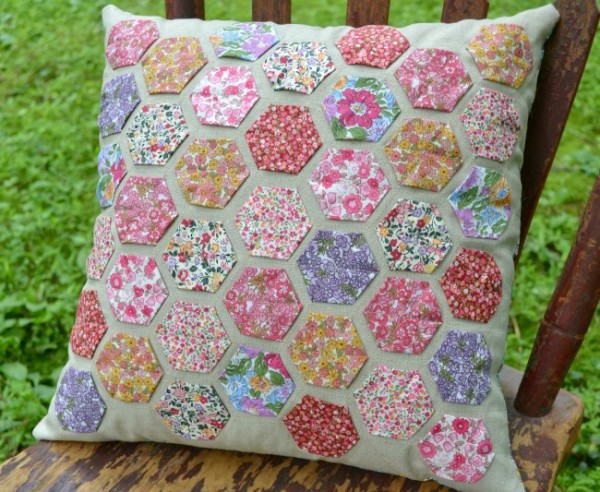
Last week I introduced you to a fun, portable project that’s perfect for using up small scraps of fabric - making hexagons. This week I’ll show you how to sew them onto fabric with your sewing machine, and next week we’ll turn them into a pillow with a hidden zipper.
If you missed last week’s post and want to catch up, you can find it here.
This week you will need:
- your pressed hexies, with basting threads and papers removed
- a 14” x 14” square of fabric for the pillow top, ironed smooth
- pins
- your sewing machine and coordinating thread
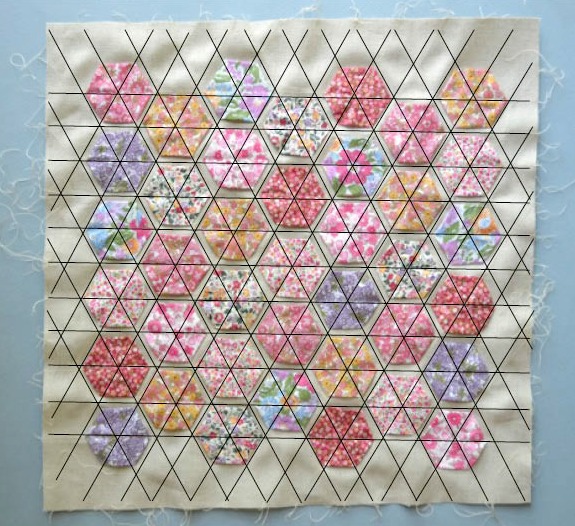
Begin by laying out your hexagons in a horizontal row across the bottom of your fabric square, as shown in the picture below:
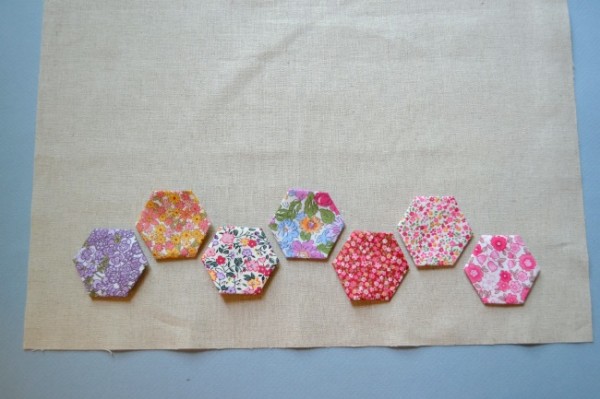
The point of the hexagon on the left should be about 1.5” away from the left edge of the fabric, and the bottom of the hexagon should be about 1.5” away from the bottom edge of the fabric.
Continue with the bottom row of hexagons, offsetting every other one. Do not pin them in place yet.
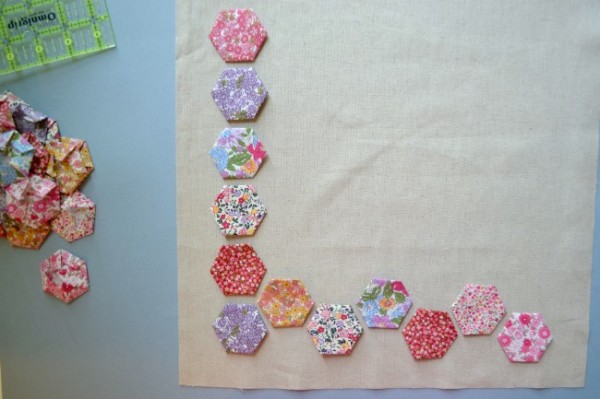
Once the bottom row is in place, add five more hexies to make the first column. You should have six total hexies in your first column and the top hexie should be about 1.5” from the top edge of the fabric.
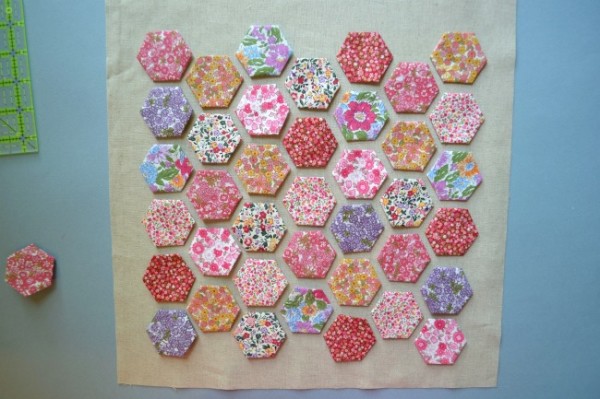
Continue filling in all of the columns and rows, using 39 hexies. If you have a few extra, you can use them to swap any out to balance the color distribution.
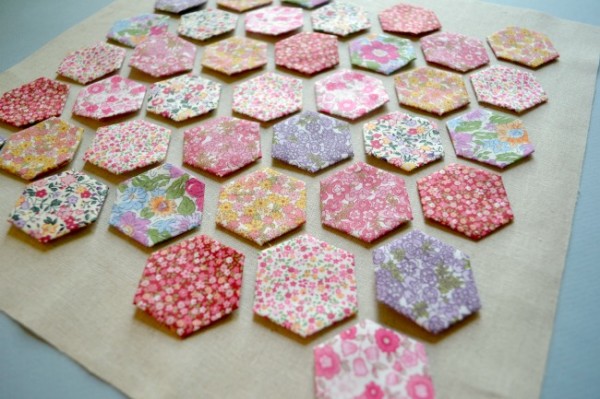
Once you’re satisfied with the placement and color distribution of your hexies, carefully pin them all in place.
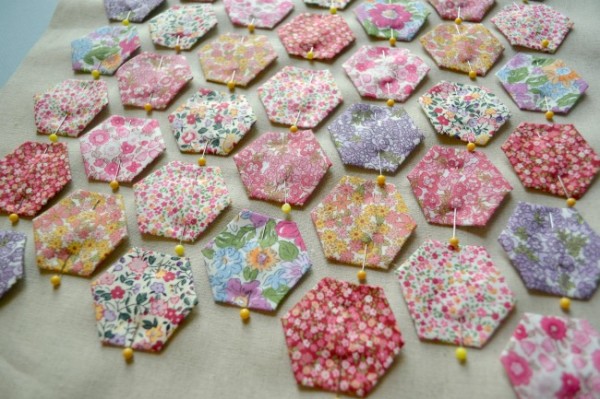
Starting on the left upper side of the pillow top, carefully sew through the point of the first hexagon, all the way through the middle and over the opposite point, down directly between the two hexagons below, through the next hexagon (point to opposite point), continuing until you reach the bottom edge of the fabric.

See the illustration below for a sewing guide of where your first set of stitch lines will fall.
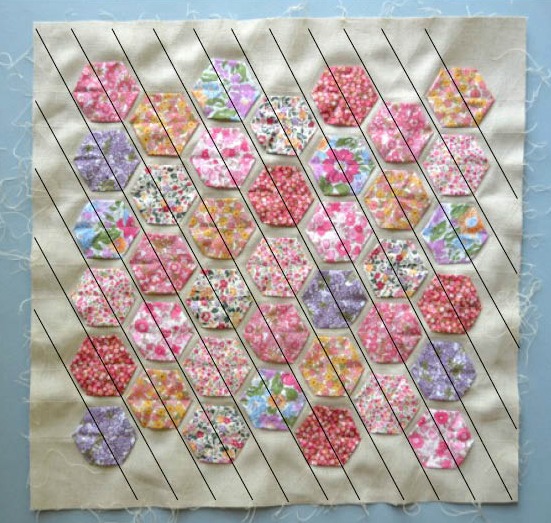
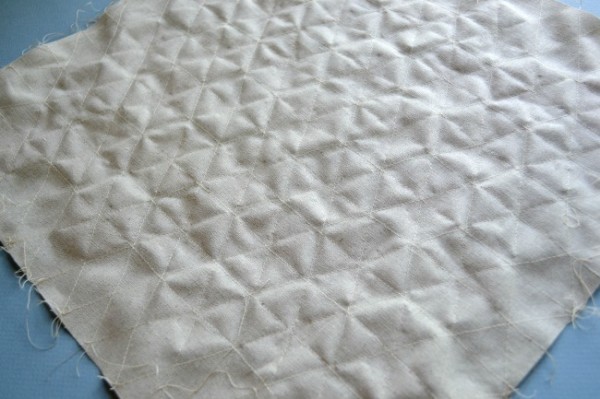
Once you have all the diagonal rows sewn in one direction, flip the pillow top so you can repeat the lines in the opposite direction.
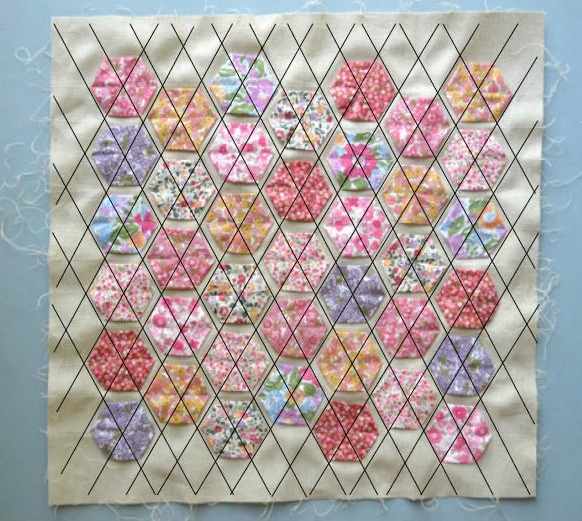
Once both diagonals are sewn, sew the horizontal lines.
When all three sets of lines are sewn, flip the pillow top over and admire your beautiful triangular grid!
That’s it for this week! Next week I’ll show you how to turn your 14” square of fabric into a pillow cover with a hidden zipper. See you then!
